|
Size: 1742
Comment:
|
Size: 2147
Comment:
|
| Deletions are marked like this. | Additions are marked like this. |
| Line 34: | Line 34: |
| {{attachment:magix.png||width=500}} | |
| Line 35: | Line 36: |
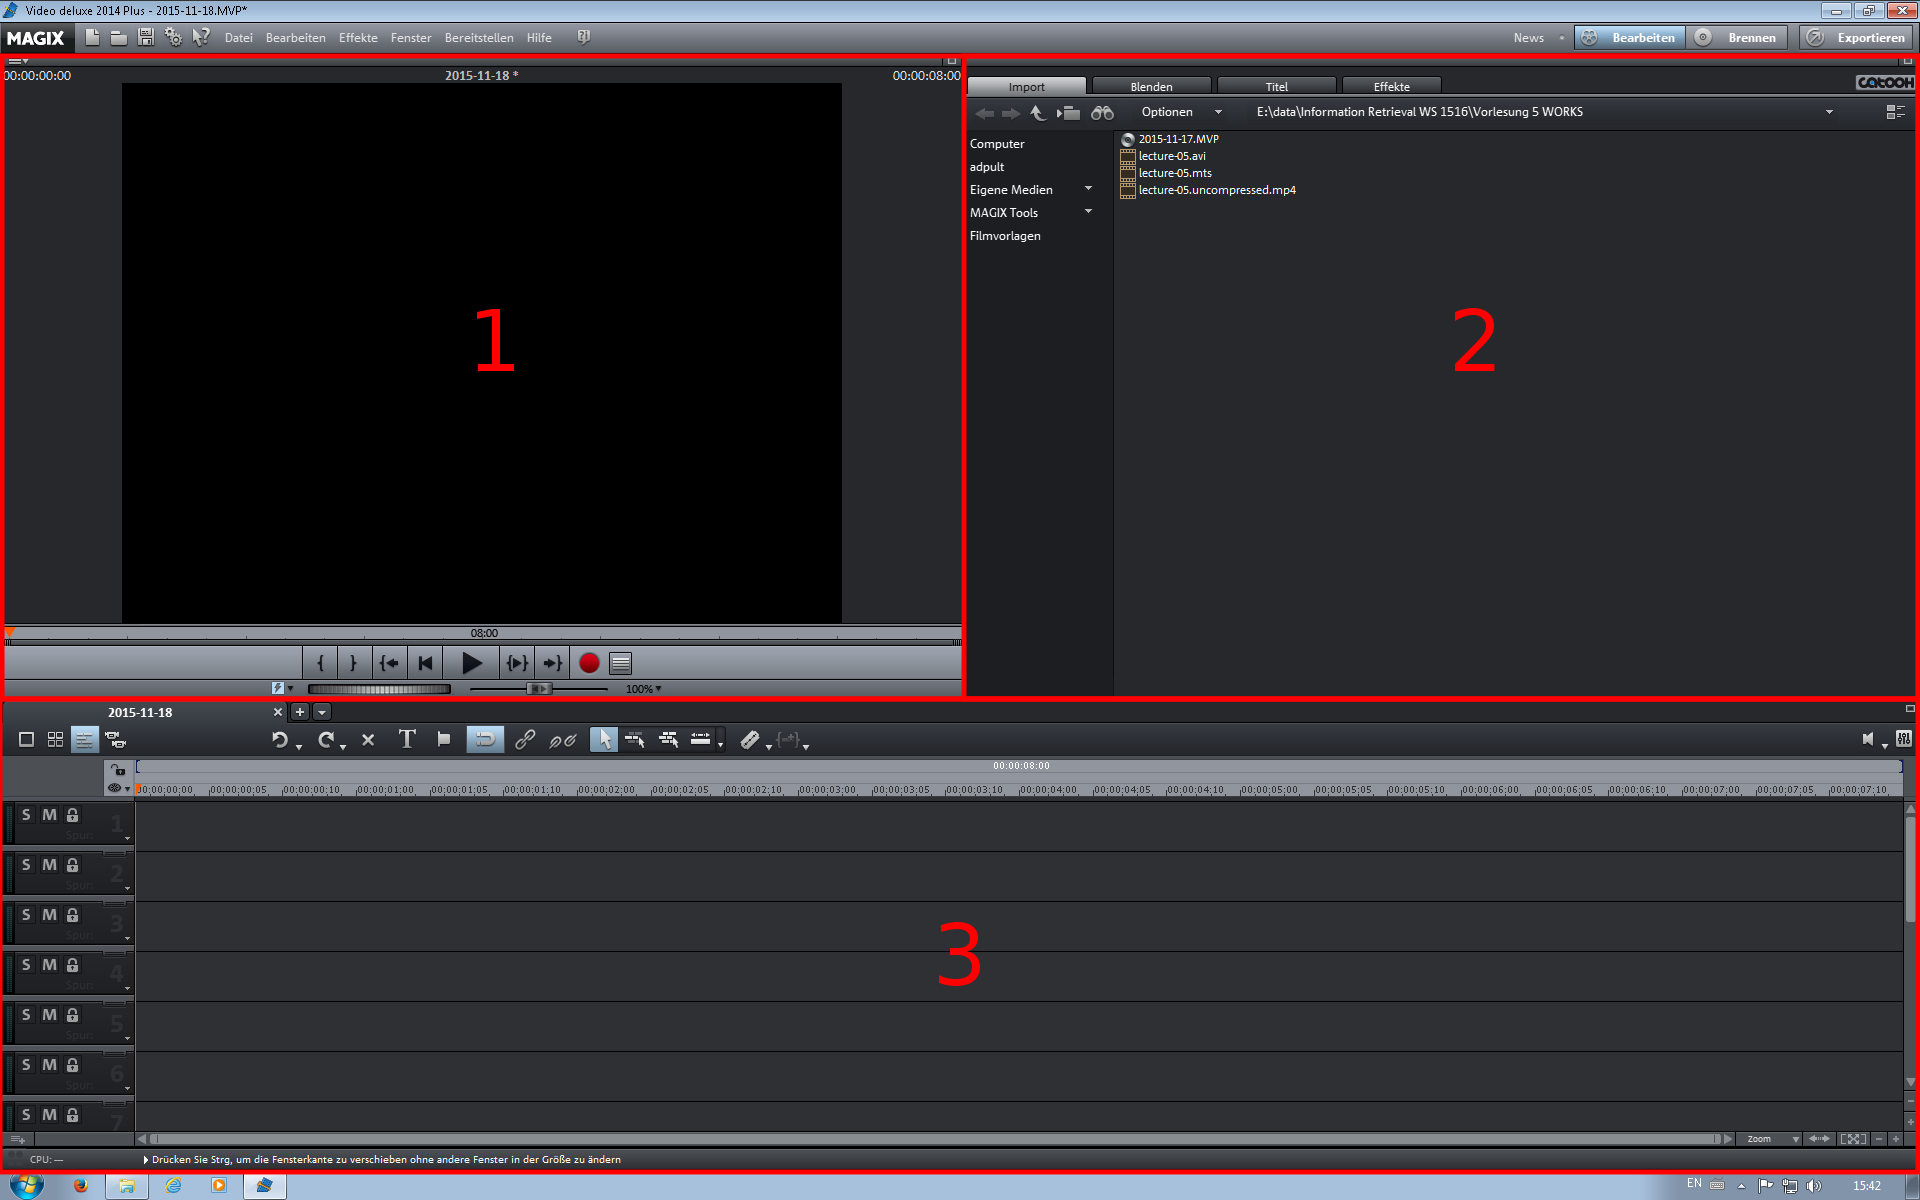
| There are 3 windows: The ''monitor'' (1), the ''pool'' (2), and the ''timeline'' (3). Click the "Import" tab in the ''pool'' browse to the movie files and drag&drop the ''avi'' into the first row (''track'') of the ''timeline''. Similar, drag&drop the ''mts'' into to the track below the ''avi track'' in the timeline. Select "Nicht anpassen" in the popping window. |
Video Editing (with Magix Video Deluxe 2014)
Login
Computer
render.informatik.uni-freiburg.de (render).
Login
- Locally in room 051-03-??
- Per Windows Remote Desktop Connection (RDC).
Start render: wakeonlan render.informatik.uni-freiburg.de.
Shutdown render: shutdown -s -t 0 (in the command-line of render).
Account
Login: adpult, Password: (the common one).
Files
Typically, there is a camtasia file (avi) and a video file (mts) for a single lecture. Copy avi and mts from the raid (\\atlantis\teaching) to render (for example, to E:\data\<course>\<lecture-X>\).
Magix Video Deluxe 2014
Create new Project
Start Magix Video Deluxe 2014 (not Magix Video Deluxe 17). Choose "Neues Projekt erstellen" and type in a project name. Click "Optionen". Check "Neuen Projektordner anlegen" and choose the project folder (that is typically the same folder where you have saved the video files). Choose "Filmeinstellungen -> Benutzerdefiniert (Filmeinstellungen öffnen)" and "Audio-Samplerate -> 48000". Click OK. In the next window, check "Anzahl der Spuren -> 16 Spuren" and "Audio-Samplerate -> 22 050 Hz". Click Ok.
Handling of Magix Video Deluxe 2014

There are 3 windows: The monitor (1), the pool (2), and the timeline (3). Click the "Import" tab in the pool browse to the movie files and drag&drop the avi into the first row (track) of the timeline. Similar, drag&drop the mts into to the track below the avi track in the timeline. Select "Nicht anpassen" in the popping window.
Import MTS problem: MTS importieren -> unten Auswählen -> Effekte -> 3D Stereo -> auf Standard (2D) umstellen.
Old description for Magix Deluxe 17: https://docs.google.com/document/d/1M8LxxStR-CWZ-2V7PgP6xXKwd4ZZhIdrtqVbwm3VQl8/edit
Editing standards for lecture videos: https://docs.google.com/document/d/1wD1Xg7zD8v7TvXrFp7CdjCV3NJ2twsZZuzS_ntNFTTc/edit#heading=h.wvzpekaxc4i6
